Showing posts with label Tutorial. Show all posts

Tuesday, October 12, 2010

Pleated Skirt Tutorial

What girl doesn't want a fun pleated skirt?!?  This would also make a great skirt for a cheerleader costume for Halloween!

This is a pretty simple tutorial...if you can sew a straight line and use an iron, you should be able to handle this. 
Enjoy!

I cut my strips 3" wide and 10" long.  Why 3"???  Because that's the width of my ruler! LOL! My daughters waist is about 20", and I used 9 strips of each fabric to make the skirt about 24".


From Pleated Skirt
Start with one of each strip.  Put the right sides together and sew a seam down one side--my seams were 3/8". 
Press the seam open.
Fold the strips (wrong sides together) and press the strips together so the seam is right along the edge.


Take the strips back to your sewing machine and sew another seam (same width as you made your previous seam) along the edge you just pressed.

From Pleated Skirt
Take another strip of fabric (alternating the fabric pieces as you go) and repeat the same steps. 
I found it worked best to do each of the above steps to each piece as I went, rather than sewing the all the pieces and then ironing/sewing the second seam on each piece.

To finish, sew each of the end pieces together (they should not be the same fabric) as you did above.
It should look something like this:
Whatever fabric you plan to have on the inside of the pleat, put that in the center.  Take the seam that is on each side and bring that to the middle. 
From Pleated Skirt
You can either pin each pleat around the skirt and then sew each pleat...or I had better luck folding each pleat and putting a few stitches in to hold it in place as I went. 

You can do the waistband however you would like.
I took a 2.5" strip and folded it in half.
From Pleated Skirt
Pin the strip to the outside of the skirt.
Sew the waistband to the skirt--make sure you adjust your seam allowance to cover the stitches you sewed to keep the pleats closed.  Also make sure the inside pleat feeds through without getting bunched up.
I used the serger to finish the seam--you can also zig-zag along the edge.
From Pleated Skirt
I used the serger on the hem so I didn't have to do a double fold. However you choose to finish your hem, make sure the outside seam on each pleat is facing whatever direction it needs to--I tend to forget about that part and have to take out my hem as the seam on the pleat gets folded the other direction and sewn down (hope that makes sense!).
From Pleated Skirt

I also made a denim skirt. I upcycled a pair of my husband's jeans that didn't fit him anymore. They were a nice, dark, lightweight denim. I salvaged the original waistband from the jeans to make a waistband for this skirt. I also made adjustable elastic (I sewed a few button holes in a piece of elastic) and sewed a button on each side so the skirt can grow with Jilli Bean.


From Pleated Skirt


BWS tips buttonHookingupwithHoHSumo Sweet Stuff
PonyTails and FishScalesJoin  us Saturdays at tatertotsandjello.com for the weekend wrap    up           party!
The Girl Creative

Sunday, September 26, 2010

Scrub Hat Tutorial

***This is my first tutorial, so I hope it is clear! ***


Give your favorite scrub tech / OR nurse / food service worker / anyone else who wears a scrub hat, some love and make them their own scrub hat!

Here are instructions on how to make a scrub hat for someone who has medium to long hair.  If you leave off the ties, it can be used by someone who doesn't need to hold their hair back.

The first time I made one of these, I started off by making a pattern out of interfacing.

Supplies:  Lightweight fabric--try to avoid heavy fabrics because they will be hot, 1/4" elastic (I sew the elastic inside the band and adjust it later, so I cut a piece the length of the back band, or a little smaller and stretch it as I sew)

Piece #1--back band:  10.5" x 2"--cut on the fold (cut piece will be 21" x 2")
Piece #2--front band:  6.5"--the center (on fold) will be 4" and the end/sides will be 2"--taper the piece slightly (final length will be 13")
Piece #3--hat:  21" diameter circle
Piece #4--ties (pattern piece not shown):  17" x 1.25" (I use an 18mm bias tape maker for the ties--adjust the width/length to meet your needs)
I made my pattern for the circle as a half-circle, but you can also make it a quarter circle by folding the fabric and marking an arc that is 10.5".
For this hat, the hat (circle) and back band are being done in black and the front band and ties are done in the pink patterned material. 
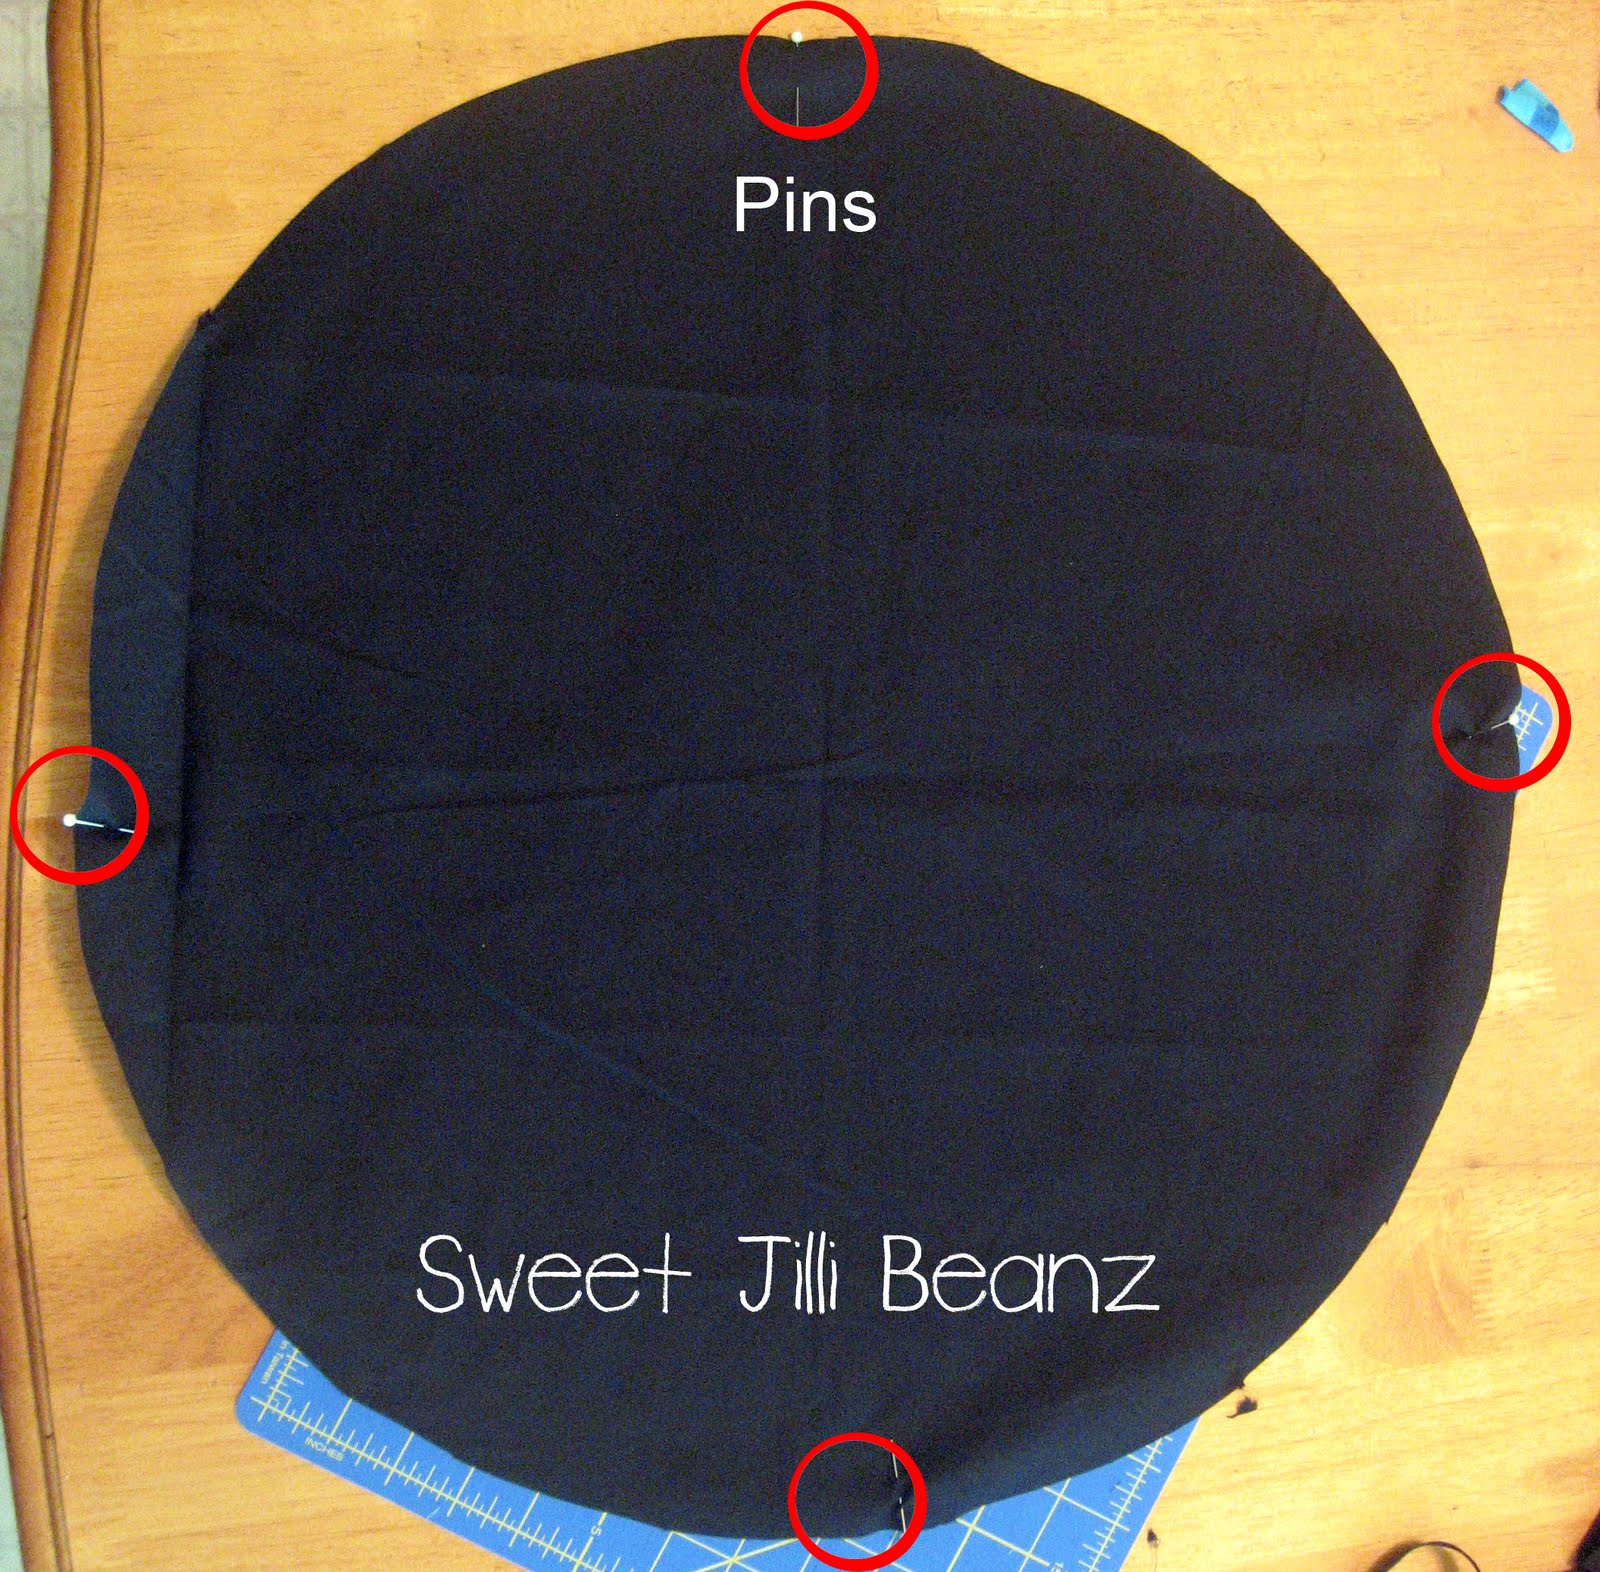
Fold the circle in half and place a pin at each side of the fold to mark them.  Fold in half the other direction to mark the other side.
Start at the top (whatever pin you want to be at the top) and make pleats from the top center to the pin on the left and from the top center to the pin on the right.  When you are finished with the pleats, half the circle will have pleats.
*You can skip this portion and gather it, but I prefer the way the pleats look.

A shortcut to speed up the pleats is to use a credit card/gift card--use the magnetic strip as a guide for your fold.  For this hat, I listened to 3 songs on my iPod while I did the pleats--I was also texting--proof that it doesn't take that long.  Pleats used to scare me...not anymore!
When doing the pleats, I did the left side one direction and the right side the other direction.  
Rotate the hat and add pleats starting at the pin at the bottom--put 3-4 pleats on each side.  You can add 1 or 2 more on each side if needed.  Make sure you are still working on the same side of the fabric as you did when you put the top pleats in (outside of hat vs. inside of hat). 
(The areas that are not pinned are the sides.)
Stitch the pleats down (close to the edge) so you can remove the pins.

Fold the back band in half and iron.  Find the center of the strip and put a buttonhole on one side (this will be used to adjust the elastic in the back).
I used a bias tape maker to make the ties and then I folded one end to finish it, and stitched the ties closed.

Now you will be stitching the front band to the back band.  At this time, you will also be attaching the elastic and the ties to the bands.  Put the right sides of the front/back band together--pin on each side.  Place one end of the elastic on the top of one half of the back band and sandwich one of the ties between the front/back band on the other side. I backstitch over the elastic and tie several times to make it secure.
Repeat on the other side--make sure the elastic is not twisted.  I use a piece of elastic that is about the same length as the back band (will adjust it at the end). 
This is how it should look after the front/back/tie/elastic are sewn together.

Fold the front band in half the long way and press down.  Fold band in half the other direction to find the center and match that to the center pleat on the front of the hat--pin in place.  Pin the rest of the front band to the had.  Match up the buttonhole on the back band (it should be in the center) to the center pleat and pin.  Pin the rest of the back band to the hat.  If necessary, add another pleat on each side or take out one of the pleats on each side so the band matches the circumference of the hat.
Sew the band to the hat and then either zig-zag or serge the edges. 

Use the buttonhole on the back band to take the elastic out and adjust it so the hat fits the wearers head.  You can cut the elastic and sew it back together so it fits, or tie a knot in it (pull it tight so it stays) and tuck the knot back through the buttonhole.  (I make these and then have the wearer decide how tight they want the elastic--they wear them for long periods of time, so don't want them to be tight and uncomfortable).

This pattern is great for people with medium to long hair.  Once the person puts the hat on, they can cross the ties underneath their ponytail and then tie the ties around their ponytail to secure their hair. 

If you have an embroidery machine, it would be cool to add the person's name to the front band.

A big thank you to my model.  LOL!


This is project #2 for me.


BWS tips buttonMakingSimpsonized Crafts


The Girl Creative


...also participating in Get Your Craft On with Today's Creative Blog


Get your craft on Thurs.Show and Tell Green