Sunday, September 12, 2010

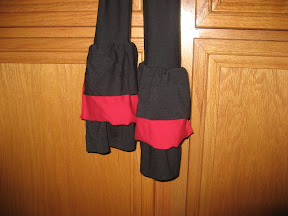
Ruffled Knit Scarf

I love the Ruffled Chiffon Scarf from Flamingo Toes.  I wanted to make it, but didn't have any chiffon and my husband has banned me from the fabric store (LOL!).  I decided to use some knit from my stash and make a scarf for my niece...just until I make it to the fabric store and get some chiffon (heeheehee)! 


I had some black and red double knit--perfect colors as she is 15 and those are her school colors (not to mention that her birthday was in July and I have yet to mail her gift, so I keep adding to it here and there).

I followed the instructions from Flamingo Toes, except I did not hem anything since I was working with knit.

I hope she will love it!!!  It is a little on the long side (wait...maybe that's the cool look)...but she's in the midwest, so it will be perfect to wrap around her neck.


From Drop Box
From Drop Box
From Drop Box

Simplifying the impossible task of tracing a toddler's hands

I came across this craft project awhile ago.  I thought it would be a cute gift for grandparents, but my Jilli was still too wiggly for me to trace her hands. 

Since it was Grandparents Day, I decided to go for it and make something like this. 

I put her hands on the scanner (she added her face!) and got a pretty good image of one of her hands--the other hand had the fingers turned (a copy machine would work too).  I printed it, cut it out and traced it onto construction paper. 

I don't have a picture of the finished project, but it turned out nothing like the lilies in the picture--it had been awhile since I saw this craft, so what I ended up with was basically handprints on a green pipe cleaner and put in a vase.  Still cute because it was Jilli's hands. 

I used the handprint on the left and it will make for some cute handprint turkeys for Thanksgiving!
***This looks like a scary picture!!! LOL!***
Her hands look a little "chubbier" since she is pressing down on the scanner,
but I thinned them out a little as I cut the printout. 
From Drop Box

Wednesday, September 8, 2010

Sweet Little Ribbon Ruffled Booty!

A quick and easy way to add ruffles to bloomers without having to hem or serge the ruffles.

Me (about 2 years old)
Jilli Bean (17 months old)
This sweet little dress was crocheted for me by my Great Aunt Hilma.  It is absolutely adorable!  My mom used a robins egg blue cotton to make a slip for me to wear under it.  Fast forward 28+ years and it now fits my sweet Jilli Bean--she is taller than I was, so it is just the right length now (I will extend the life of the dress by adding leggings or tights when it gets cooler). 

She needed something to cover her bottom, so I had my mind set on making bloomers that matched the slip.  I was bummed to find that there was no solid color at Joann's that matched the slip, so I got plain white fabric.  I swung on over to the ribbon aisle and found a roll of satin wired ribbon that matched the slip perfectly (my sewing buddy had used ribbon for some bloomers and it was so quick and easy)!

I used the bloomer pattern from Lotta Jansdotter's Simple Sewing for Baby (I traced the pattern on paper and then cut them a little bit bigger as this pattern was for newborn or 6-12 months).  This pattern is great for adding ruffles as the seams are on the side--the my other bloomer patterns have a seam in the front and back.  I took the wire out of the ribbon, cut three pieces of ribbon 2.5 times the width of the bloomers and ran two rows of gathering stitches on each ribbon, gathered the ribbon and pinned it on the back of the bloomers and sewed the three rows of ruffles on.  I happened to have thread that matched the ribbon, so I used that for the top and white thread in the bobbin--you have to be careful when using a seam ripper on the satin ribbon as it can snag and damage the ribbon.  My thread matched so well that I cheated and left the gathering stitches in.  I followed the rest of the directions from the pattern for assembling the bloomers and was quite pleased with the result!

Monday, September 6, 2010

Slipcover for Child's Pull-Out Foam Couch

What little one wouldn't love a pull-out couch to lounge on???

I love the idea...but I hated the patterns I had to choose from.  To begin, my living room is filled with toys, so the last thing I wanted to add was a piece of furniture that had cartoon characters all over it (no offense).  My Jilli Bean is still too young to really care (however, I think she has a crush on Diego from Go, Diego, Go). 

I searched the web for patterns to make these couches, but I didn't come up with much.  The most I could find was a rough sketch with dimensions--I could handle putting the foam together, but I envisioned a complete nightmare when making the slipcover without a pattern.

I found this at the toy store (normally $44.99 on clearance for $24.97--I probably could have found one at a second hand store, yard sale or Craigslist, but I have allergies so a new one was better for me):
It's cute...but I knew it would soon be an eyesore and I would be sick of it...so I decided to use the existing cover as a pattern.

I went to the "fabric by the pound" store and found some Soft & Comfy-type fabric in a light pink.  It normally runs about $12.99/yard at the fabric store, but I got 2-3 yards (almost 2 pounds) for less than $11 (I have plenty of fabric leftover).

I took pictures of the slipcover after I took it off (so I knew how it was supposed to look when the foam wasn't inside) so I knew where each piece went and which direction it was supposed to face (since I wanted the fabric to be going the correct way).

From Drop Box
From Drop Box
I grabbed my seam ripper, got comfy on the couch and watched tv while I ripped out every single seam (with the exception of the zipper that was sewn to the fabric on the bottom of the couch).  I laid out the pink fabric and placed each piece on it, making sure that the grain of the fabric was going the correct way, and cut out each piece.
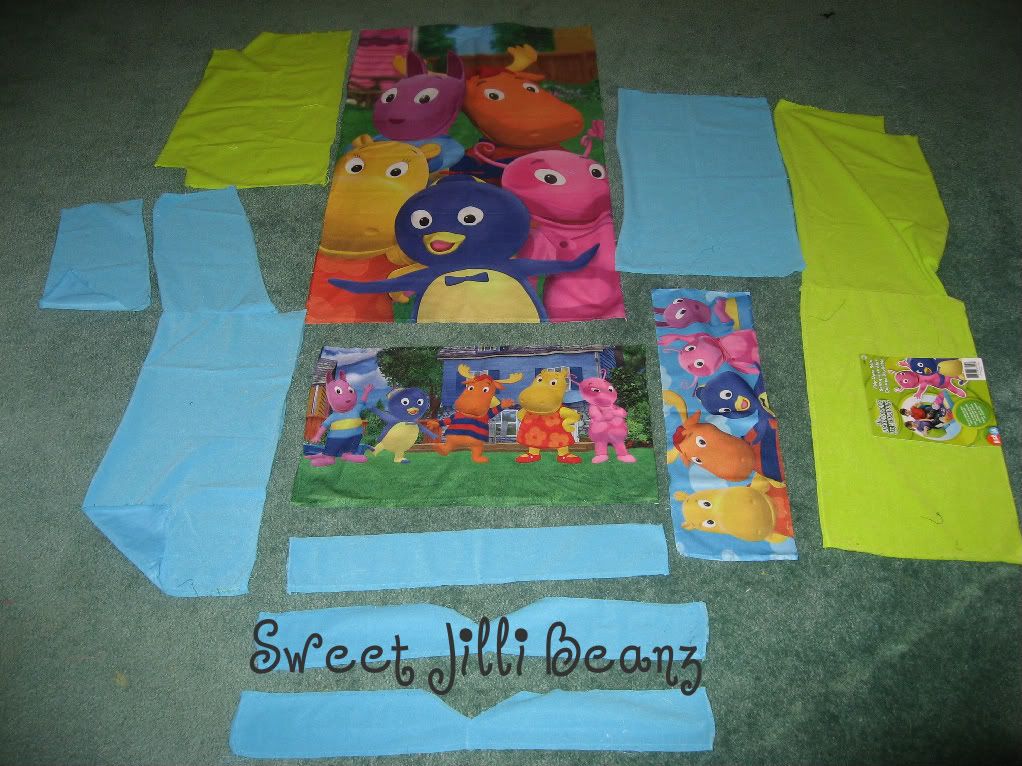
This is all the pieces of the original slipcover after I took it apart. (The bottoms piece, with the zipper, is not shown.)

I wasn't sure how to secure the cover on the foam--my initial thought was elastic (wanted it to be removable so it could be washed), but I decided to salvage the bottom of the couch (had a large zipper that ran along 3 sides of the couch)--it was lime green, but it was on the bottom and wouldn't show.  I attached that to the pink fabric.  The original cover had a piece of Velcro that was sewn to the seat of the cover and the other side was stuck to the foam (it had come unstuck).  I have yet to attach that to the new slipcover.  It would help

The entire project took approximately 7 hours (of course I was excited to get it done and did the majority in one night).  I love the way it turned out, but have absolutely no intentions of doing this again!  (However, I did save the pieces I used as a pattern...you never know!)  It wasn't that difficult, just time consuming, but well worth it! My Jilli Bean loves it!




NightOwlCrafting

HookingupwithHoH

Pretty in Pink!

A couple months ago I came across The Train to Crazy blog. I fell in love with these outfits.

I was at a "fabric by the pound" store and came across this great pink
striped knit and knew I just had to copy her! I found a similar pattern, Simplicity 5695, and made a few little changes. Initially, I made it into a dress, but decided to shorten it. I also loved the leggings The Train to Crazy made to go with the dress, so I bought the same pattern from Lil Blue Boo.This was my first time, ever, sewing with knits. I had issues with the stretch stitch on my machine (fast forward a few months and I found how to adjust that--DUH!) so was bound and determined to use the serger for as much as I possibly could. It also helps to have the correct tension settings on the serger (some minor issues there). The leggings were so easy and I loved that the pattern went from size 6m-8, so I will be using this pattern for a long time. For these, I did a rolled hem on the serger and added a piece of elastic to each side for ruching.

Last night I finally hemmed the shirt and restitched (on the sewing machine) a couple areas and I fell in love with the outfit! (The headband is from Bucket of Bows Boutique.) It is the perfect style to play in...and the pants are easy to get on/off for potty training.I can't wait to make this dress! I've already purchased fabric to make a couple of these for this fall/winter.

Hello!

I'm not exactly sure what I'm doing with my own blog, but I figured, hey, why not!

I work part-time, so one would think I have plenty of free time...uh, no. I find that my crafting and sewing occurs only when my little one is sleeping. Or...if I'm really brave, I'll hurry up and finish something while she is playing--a.k.a. she's playing in the sewing room. That isn't always the best because one of her favorite activities is taking my pins out of the pin cushion and throwing them around the room. Trust me, when you find a stray pin with the bottom of your foot it hurts!
This is the first outfit I made for my Jilli Bean last year. A pillowcase dress and bloomers are a perfect thing to start with when you haven't sewed for a long time. This was sort of foreign to me since I learned to sew when I was 7 years old (courtesy of my mom) and I learned to follow a tissue pattern. Here I was, sewing on a machine I had never used before (I inherited my aunt's New Home MX3123 machine) and following directions that only had dimensions...no actual pattern to use to cut out. I was quite pleased with the way it turned out ...and she can still wear it at 18 months old! (Did I mention I had an obsession with headbands, bows and other hair items for her???) I did use a pattern for the bloomers, but they technically still fit too...but they could use to have the elastic replaced so they weren't so snug.